nice big nipples and big big boobs and pussy videos indiansexmovies.mobi filho da puta vou comer seu cu arrombado do caralho babe porn indian desi actress short and hot nude bold photos

4 Fabulous Fall Fruit Cobblers And Crisps

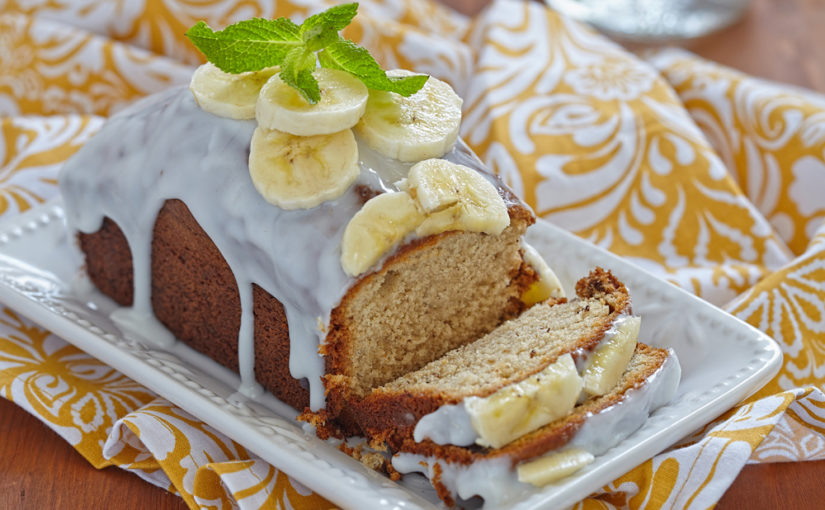
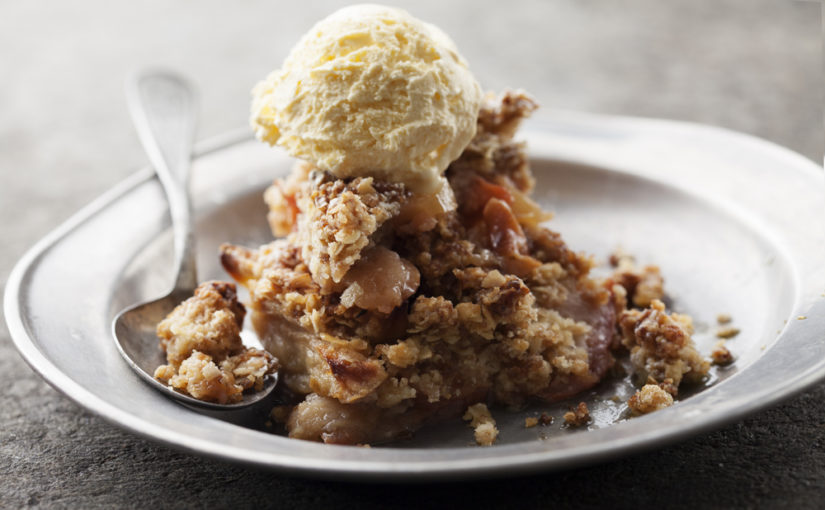
Warm fruit cobblers and crisps are a perfect way to enjoy the bounty of seasonal fall produce.

Unlike a traditional pie, cobblers and crisps feature a crumbled topping (made of oats, sugar and spices), homemade shortcake biscuits, or a cake batter crust.

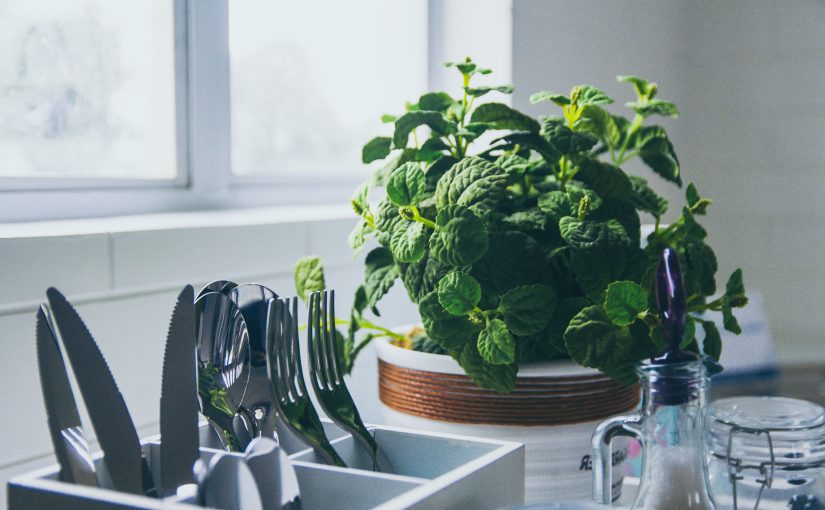
There’s no need to visit a country bakery or fall festival stand when you can easily make a scrumptious fruit cobbler or crisp at home, with fresh, wholesome ingredients from your kitchen pantry cabinet. If this sounds heavenly to you, here are a few fabulous recipes to try this fall!

Apple Cranberry Crisp

This delightfully simple recipe from Better Homes and Gardens lets cranberries and apples shine. Two fall favorites, these fresh fruits can be a tad on the tart side, but the crunchy oat, cinnamon and brown sugar topping adds just the right amount of sweetness. For the recipe from BHG, click here. While fresh fruit generally makes cobblers and crisps healthier than most desserts, this one is also on the lighter side at just 213 calories per serving!

Pear Cobbler

Pears are harvested in the fall, and come in a variety of shapes and textures, but firmer varieties like Bosc, Anjou, or Asian pears are most suited for baking in a crisp. This easy Pear Crisp recipe from The Spruce Eats has a buttery cake batter crust, and you can mix and match whichever pears you prefer. Once baked, this cobbler can sit at room temperature on the kitchen island for two days or in the refrigerator for five days — but we bet it won’t be around that long! Click here for the recipe from The Spruce Eats.

Pineapple Ginger Crisp

Pineapples are in season year-round, but when paired with freshly grated ginger and a crumbled topping of old-fashioned oats, brown sugar, and nutmeg from your spice rack, you’ll have the perfect sweet and spicy cobbler to welcome fall. This recipe from Fine Cooking is easy to make and bakes up bubbly brown in just 20 minutes. Click herefor the instructions and ingredients you will need from your kitchen pantry cabinet.

Cherry Cobbler

With sweet cherries, vanilla and almond extract, and warm cinnamon, Bon Appétit’s Cherry Cobbler is sure to be a fall favorite. Topped with shortcake biscuits, this delicious dessert takes a bit more work than the others, but it is well worth the effort when you have a gorgeous cherry cobbler sitting on your kitchen countertop. To get the recipe, click here.

Dream kitchens are meant to be filled with the warm aroma of freshly baked desserts come autumn, whether it’s a pie, cobbler or crisp cooling on the kitchen island or in a bowl topped with a scoop of vanilla ice cream. Which one are you most excited to try?


Welcome to Willow Lane Cabinetry — the #1 place to buy affordable, semi-custom cabinets online! Let us help you create the kitchen, home office, home bar, laundry room, TV room or bath of your dreams with our 100% free room design tool. We offer all wood cabinetry, fully assembled and delivered for free, plus all the accessories needed to complete your remodel. Visit our website to see our products today!

3 Make-Ahead Breakfast Breads For Busy Fall Mornings

If your mornings consist of a bowl of cereal at the kitchen island or a granola bar and quick cup of coffee as you head out the door, you are not alone. Between work and school and the general rush of daily life, it’s hard to find time for a wholesome and delicious homemade breakfast. But there is a compromise. A good breakfast doesn’t have to be a hot meal, and it doesnt have to be corn flakes, either. Not when you can easily whip up a tasty breakfast bread the night before — in your very own kitchen! Make it, bake it and set it to cool on the kitchen island, and you’ll have a sweet and satifying breakfast waiting for you in the morning. All you need to do is cut off a slice and enjoy! Here are a few of our fall favorites.

Banana Bread

Banana bread is a classic, and it has seen a huge resurgence this year. In fact, CNN called it the “unofficial snack of the coronavirus pandemic” in a recent article titled, Banana Bread is Having a Moment. Not only is baking good for your mental health, but there is no better use for spotty bananas! As bananas age, they get sweeter, but they also become a bit too mushy to eat like you normally would. Instead, pull up your heavy-duty mixer and put them to good use.

There are tons of recipes out there, from old-fashioned cookbooks to Pinterest, but we like this one from Sally’s Baking Addiction. Super moist, thanks to the addition of yogurt or sour cream, plus crunchy nuts (optional) and a hint of ground cinnamon from your spice rack, this breakfast bread is healthy and sure to please. For the complete recipe, plus how to make a fabulous cream cheese frosting, click here. You can even use leftovers to make Banana Bread French Toast on a lazy weekend morning!

Pumpkin Bread

Lightly sweet and also a bit savory, Pumpkin Bread is the quintessential autum breakfast. This healthy version features all the warm spices traditionally paired with pumpkin (allspice, cinnamon and nutmeg), plus a few unexpected ingredients from your kitchen pantry cabinet, like whole wheat pastry flour and extra virgin olive oil — and pumpkin puree, of course. For the recipe from Love & Lemons, click here.

Apple Cinnamon Bread

Perfect for busy fall mornings, this recipe from Delish food editor Lena Abraham calls for tart Granny Smith apples, but feel free to substitute your favorite variety. Like apple pie in loaf form, Apple Cinnamon Bread is sure to become your family’s new fall favorite. And it’s healthy, too! According to Eating Well, there is truth behind the old adage, “An apple a day keeps the doctor away.” Like the other fruits that flavor this list of breakfast breads, apples are both delicious and nutritious, and are a great ingredient to help start the day off right. Click here for the recipe from Delish.

All of these breakfast breads should keep well at room temperature for a few days, or store them in the refrigerator until you want a slice. Just make sure to let them cool completely on the kitchen island first and then wrap them well.


Welcome to Willow Lane Cabinetry — the #1 place to buy affordable, semi-custom cabinets online! Let us help you create the kitchen, home office, home bar, laundry room, TV room or bath of your dreams with our 100% free room design tool. We offer all wood cabinetry, fully assembled and delivered for free, plus all the accessories needed to complete your remodel. Visit our website to see our products today!

3 Grown Up Granita Recipes To Make This Summer

If you’re looking for a way to beat the heat, why not head to the kitchen for a granita. This semi-frozen Italian dessert originated on the island of Sicily, off the sunny coast of the Mediterranean Sea. A granita gets its light, fluffy texture from scraping ice crystals with a fork during the freezing process. And the ingredients are as simple as can be — typically water, fresh fruit juice (or coffee) and sugar.

While a granita may sound like a grown-up version of a snow cone, it’s even better than you could imagine, especially when you add spirits from your bar cabinet into the mix. Thankfully, you don’t have to travel to Italy to try this amazing treat when you can make it right in your own kitchen! Here are a few of our favorite granita recipes to make this summer, plus easy-to-follow instructions for perfecting the freezer method.

The Freezer Method

Making a granita requires a bit of patience but is ultimately easy to accomplish. Simply mix your ingredients in a flat baking dish and place it in the freezer (tip: metal freezes quicker than tempered glass or ceramic). After about 30 minutes, remove the baking dish, scrape or break up the ice crystals with a fork, and return the baking dish to the freezer. Follow this process for two hours or until your granita reaches a coarse, slushy consistency. Scoop some into a glass, grab a spoon, and enjoy!

Lime Granita

Savoring a Lime Granita is a refreshing way to cool down on a sweltering summer day. This recipe features freshly squeezed lime juice plus lime zest for an extra touch of tartness. And don’t forget the sugar! If you don’t have time for the freezer method, you can also use an ice cream maker. For instructions from An Italian in My Kitchen, click here. If you’re over 21 and want to spike your summer dessert, tequila pairs nicely with lime.

Watermelon Granita

For this granita, puree chunks of seedless watermelon in a blender with freshly squeezed lime juice, and strain through a sieve. Sweeten to taste with simple syrup (typically a few tablespoons per cup will do). Nice additions to a Watermelon Granita include finely chopped, fresh mint leaves or a pinch of salt. For a light and refreshing adult twist, try this recipe from Skinnytaste with a splash of vodka or white rum from your bar cabinet.

Coffee Granita

If you want to chill with a caffeine boost, try this Granita di Caffè (Coffee Granita) from Italy Magazine. Brew espresso with filtered water from your refrigerator or kitchen sink and cool it to room temperature. Add simple syrup and begin the freezer method. Like your favorite Frappuchino, top your Coffee Granita with whipped cream before serving. To make this granita even more grown-up, just add coffee liqueur.

If you make a large batch and miraculously have some left, granitas can be stored in the freezer for several days covered with plastic wrap. When ready to serve, let the ice slightly melt on the kitchen island and scrape it with a fork to return the granita to the correct consistency.


Welcome to Willow Lane Cabinetry — the #1 place to buy affordable, semi-custom cabinets online! Let us help you create the kitchen, home office, home bar, laundry room, TV room or bath of your dreams with our 100% free room design tool. We offer all wood cabinetry, fully assembled and delivered for free, plus all the accessories needed to complete your remodel. Visit our website to see our products today!

How To Make Homemade Trail Mix Without Leaving Your Kitchen

Homemade trail mix is one of those great grab and go snack ideas that not only satisfies your hunger, but also satisfies your taste buds! The perfect blend of crunchy, chewy, salty, and sweet ingredients, homemade trail mix is healthy and easy to make — right in your very own kitchen!

As an added bonus, homemade trail mix is easier on the wallet than store-bought varieties. All you need are a few simple ingredients that you probably already have in your kitchen pantry cabinet. So go ahead, get creative! Once you know how to make homemade trail mix, you can whip up a batch for those marathon holiday shopping trips and another for gifting!


Ingredients 12-3-19 WLC2 How To Make Homemade Trail Mix Without Leaving Your Kitchen

Homemade trail mix is designed to be eaten by the handful, so think small when shopping or raiding your kitchen pantry cabinet. Common ingredients for homemade trail mix include:

  • Nuts (Walnuts, Almonds, Pecans, Cashews, Pistachios, Macadamia Nuts)
  • Seeds (Roasted Pumpkin Seeds, Sunflower Seeds)
  • Peanuts (Spanish, Dry Roasted, Candied)
  • Breakfast Cereal (Granola, Flakes, O’s)
  • Chocolate Chips (White, Semi-Sweet, Milk Chocolate)
  • Carob Chips
  • Butterscotch Chips
  • Peanut Butter Chips
  • Mini Marshmallows
  • M&Ms
  • Shredded Coconut
  • Banana Chips
  • Raisins and Other Dried Fruit (Apples, Cranberries, Apricots, Blueberries, Papaya, Pineapple)
  • Crystalized Ginger
  • Candied Orange Peel
  • Rye Chips
  • Cheese Crackers (bite-sized)
  • Pretzels (mini pretzels, pretzel sticks)
  • Wasabi Peas
  • Popcorn

Instructions

Nothing could be easier than making homemade trail mix. Simply spread out the all ingredient packages across your kitchen island countertop, scoop out each individual ingredient into a large mixing bowl, and gently combine all the ingredients with a wooden spoon or rubber spatula.

Depending on the ingredients you choose (sweet or savory), you can also season your homemade trail mix with spices from your door mounted spice rack or wood spice tray, like sea salt, sugar, cinnamon, nutmeg, garlic powder, onion powder, chili powder, curry powder, or Cayenne pepper.

Homemade trail mix will keep for up to a month when stored properly in Mason jars (for gifting) or an airtight container (for your enjoyment). If you’re making a large batch, it’s best to keep your trail mix in the refrigerator instead of in the kitchen pantry cabinet. Small batches can be bagged into individual portions for grab and go snacking during the busy holiday season.


Welcome to Willow Lane Cabinetry — the #1 place to buy affordable, semi-custom cabinets online! Let us help you create the kitchen, home office, home bar, laundry room, TV room or bath of your dreams with our 100% free room design tool. We offer all wood cabinetry, fully assembled and delivered for free, plus all the accessories needed to complete your remodel. Visit our website to see our products today!

How To Preserve Fresh Summer Herbs For Fall And Winter Cooking

When you think of dream kitchens, do you picture families gathered around the table for home-cooked meals and freshly baked desserts cooling on the kitchen island countertop? With the summer season approaching its end and holiday hosting on the horizon, now is the time to think about preserving your fresh summer herbs for fall and winter cooking and baking. Read on to learn how.


Keeping Herbs Fresh In The Fridge

Keep herbs fresh by wrapping them in a damp paper towel and storing them in a plastic container or re-sealable plastic bag. You can also trim the stems and place your herbs in a glass jar filled with water. Cover the top with a plastic baggie to maintain moisture, and store them in the refrigerator. This method works well for long-stemmed herbs like cilantro, rosemary, thyme, chives, and parsley, but it will not work with basil.


Hang Drying

For this tried and true method, tie a handful of herb stems together at the bottom using a bit of string or yarn. Hang these tidy bundles in a warm place inside your home and let them dry for anywhere from a few days to two weeks, depending on humidity and the type of herb you are drying. This method works well for woody herbs like rosemary, oregano and thyme, as well as chives, dill marjoram, tarragon, and sage (a staple in Thanksgiving stuffing recipes). For more tips on air drying herbs from Better Homes and Gardens, click here.

Freeze Drying

For this simple method, line a large baking tray with freezer paper. Remove the leaves from the stems and neatly arrange the leaves on the baking tray in a single layer. Place the tray of herbs in the freezer for 30 minutes to an hour, depending on the herb. Move your herbs to a re-sealable freezer bag, and store your freeze-dried herbs in the freezer for later use. This method is ideal for basil, chives, dill, mint, oregano, sage, tarragon, thyme, and lemongrass.

Herbs can add unmatched flavor to your fall and winter dishes and desserts. Keep your kitchen pantry cabinet spice rack well stocked by trying one of these simple methods, and join the ranks of dream kitchens filled with food and family.


Welcome to Willow Lane Cabinetry — the #1 place to buy affordable, semi-custom cabinets online! Let us help you create the kitchen, home office, home bar, laundry room, TV room, or bath of your dreams with our 100% free room design tool. We offer all wood cabinetry, fully assembled and delivered for free. Plus all the accessories you need to complete your remodel. Visit our website to see our products today!

Growing Summer Herbs Indoors

Want to start growing summer herbs so you can easily incorporate them into your cooking without having to constantly run to the store? Luckily, you don’t need a huge outdoor herb garden to have fresh-grown herbs on hand in the kitchen whenever you need them.

Follow our tips below for growing and maintaining summer herbs indoors and, before you know it, you’ll be rewarded with herbs that taste extra delicious and smell lovely!

Top Tips for Growing Summer Herbs Indoors

Caring for indoor herbs is pretty low-maintenance, as they mainly need a sufficient amount of light to thrive. Below are some simple tips for growing indoor herbs:

  1. Light is the biggest factor in caring for indoor herbs, so the location you keep them in needs to have an ample amount of sunlight in order for them to flourish. A minimum of 4-6 hours of light a day, depending on the specific herb, is recommended for them to grow successfully.

If you don’t have a window, kitchen countertop or other spot in your home that will provide the amount of sunlight needed, you may need to use shop lights or grow lights for your indoor herbs to thrive.

  1. Don’t water herbs too frequently. Since herbs have minimal nutrient and water requirements, you don’t have to worry about constantly watering them. You’ll want to allow them to dry, but not to the point where they’re dried up. A good rule of thumb is to water your herbs when the soil becomes dry to the touch. In between watering, simply mist the leaves.
  1. Good drainage is important to ensure your herbs don’t get overwatered. A lightweight potting mix will keep the roots of your herbs from sitting in water. Also, a soft-sided container or a clay pot with sufficient drainage will provide even better drainage and allow oxygen into the root.
  1. Snip constantly. You’ll want to snip your herb leaves and use them for cooking regularly to keep them growing and delay flowering. Once they flower and produce seeds, they’re on their way out.
  1. Keep herbs in an area with low humidity or use a fan to circulate the air in your kitchen to prevent powdery mildew from forming on the leaves.

Wondering what herbs to grow? Basil, mint, thyme, rosemary and sage are all versatile herbs that complement an array of summer dishes. Whichever ones you decide to start with, be sure to get into the habit of using them in your cooking and enjoy the delicious flavor they add to your meals!